Quick Tips
- You can connect your Sharp Smart TV to WiFi by using the settings.
- Press Menu (on remote) → Smart TV → Internet Set up → Connection type → Wireless → Connect to WiFi.
If you have purchased a new Sharp Smart TV (Android OS and Roku OS), you need to connect it to a stable WiFi network to stream the contents and surf the internet. Even you can connect the smart TV to a wired connection as well. If you are looking to connect the Ethernet cable, it is not possible since the Sharp Smart TVs don’t have Ethernet ports. But, still, you can connect the cable using the USB Ethernet adapter to connect your smart TV.
How to Connect to WiFi via Wireless Connection
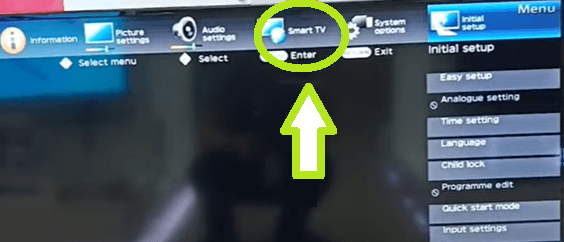
1. Press Menu on your Sharp Smart TV remote.
2. Select Smart TV on the Menu bar.
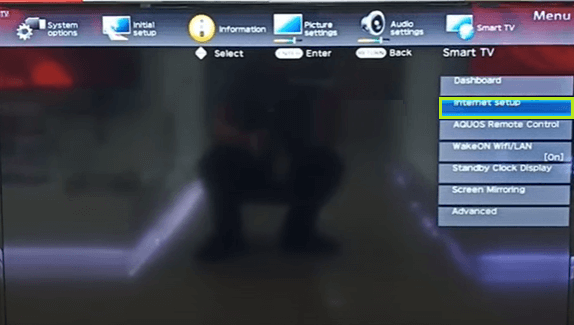
3. From the drop-down box, select Internet Setup.
4. Select Connection type.
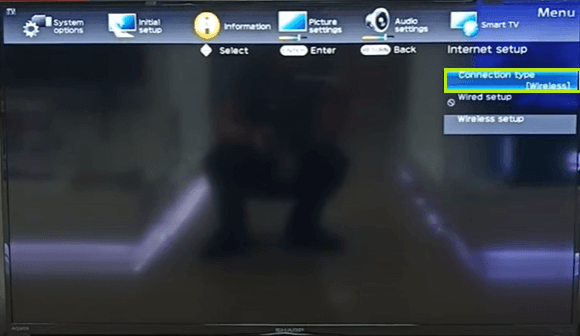
5. Choose wired or wireless based on your preference.
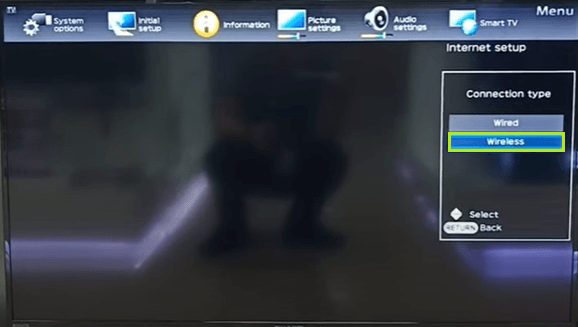
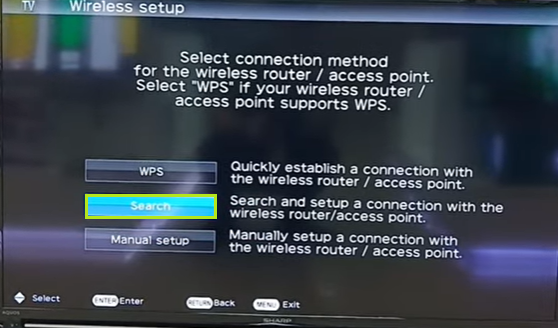
6. Choose Wireless. Select Search to see the list of available WiFi connections.
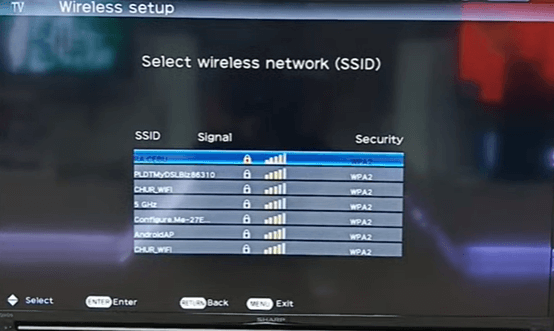
7. Select your WiFi name from the list of available options.
8. Type the Password of your WiFi on the security key box and select Next.
Note: If your password has numbers, select Up Arrow to insert numbers.
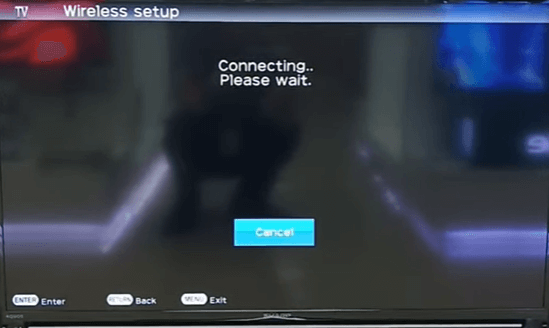
9. Your smart TV will connect to your WiFi.
How to Connect to WiFi via Wired Connection
You can also connect your smart TV to a WiFi connection using the ethernet cables. While using ethernet cables, the internet speed will be faster than the wireless connection. Moreover, it is easy and simple to set up.
How to Connect Sharp Smart TV to WiFi: Android OS
1. Select Settings on your Sharp Android TV.
2. Next, select Network and Internet → WiFi. Choose Wired setup if you are using ethernet cables or LAN.
| Note: Depending on the model of your TV, choose Easy setup or Easy after selecting Network and Internet. |
3. Your Sharp Andriod TV will start to scan for WiFi
4. Enter the password and connect to the WiFi.
How to Connect Sharp Smart TV to WiFi: Roku OS
1. Press Home on the TV remote.
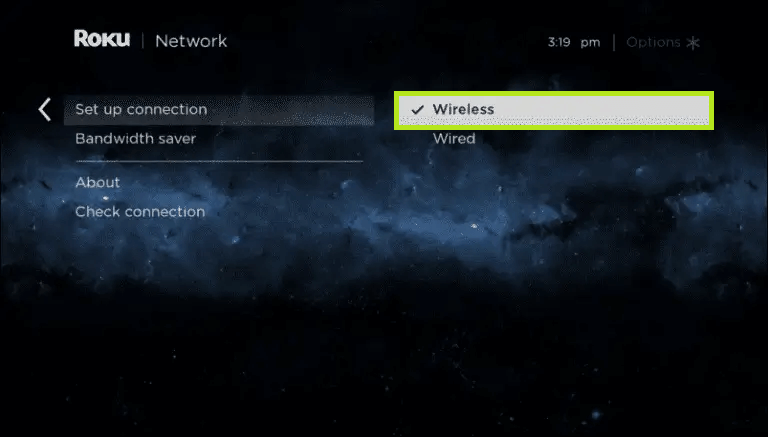
2. From the home screen, click on Settings → Network.
3. Select Set up connection and choose Wired or Wireless.
4. If you select Wired connection, your Roku TV will automatically connect to the network.
5. If you select Wireless Connection, the list of active WiFi connections will be displayed on the screen.
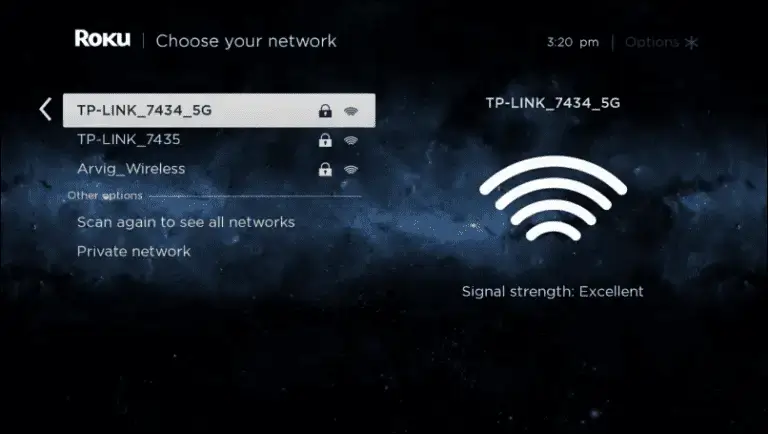
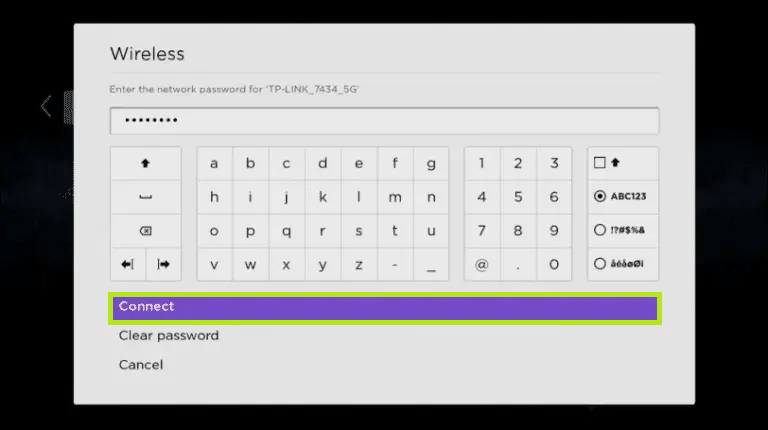
6. Select the desired WiFi, enter the password and select Connect.
Note: You can also connect the Roku TV to WiFi without using the remote.
FAQs
Connecting the keyboard and mouse to your smart TV using the USB cable allows you to connect to the WiFi without using the remote.
Sometimes, you can’t connect your smart TV to the internet for certain reasons. To fix, reset your network settings, update your Sharp Smart TV to the latest firmware and try connecting to the WiFi.