Quick Tips
- You can configure the DNS on your Samsung Smart TV to access the restricted content
- Settings → General → Network → Network Status → IP Settings → DNS Settings → Enter Manually.
Domain Name System (DNS) transforms domain names into a numeric IP address, which enables us to surf and stream the required information on our device. You can also find the DNS settings on most smart TVs. But, the drawback is that you can’t access the content outside the specific region. You must change the DNS settings on your Samsung Smart TV or other TVs to access it.
How to Setup DNS on Samsung Smart TV
Connect your Samsung Smart TV to the WiFi network connection before setting up the DNS on your smart TV.
[1] Launch the Samsung Smart TV and press Menu/Settings on the remote.

[2] Under Settings, select General.
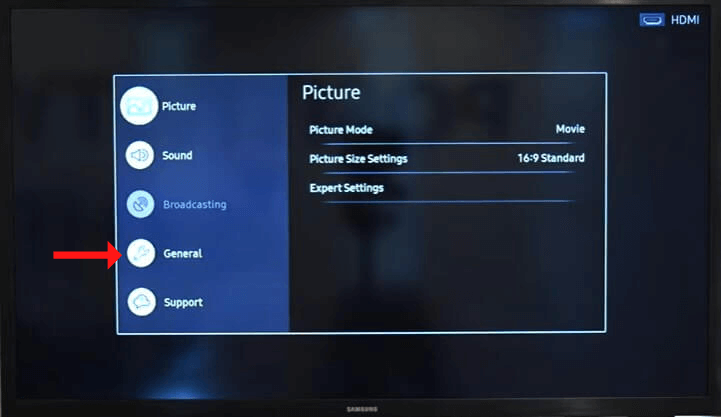
[3] In the General settings, select Network.
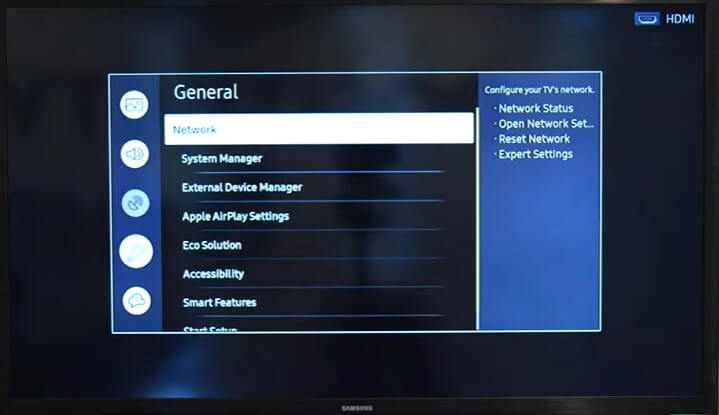
[4] Next, select Network Status.
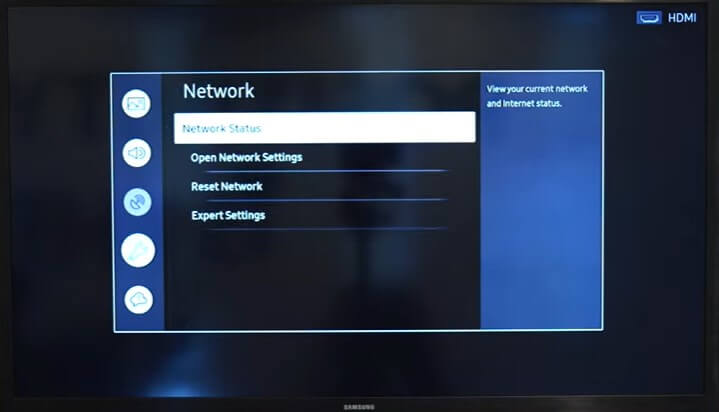
[5] Select IP Settings in the Network Status dialog box.
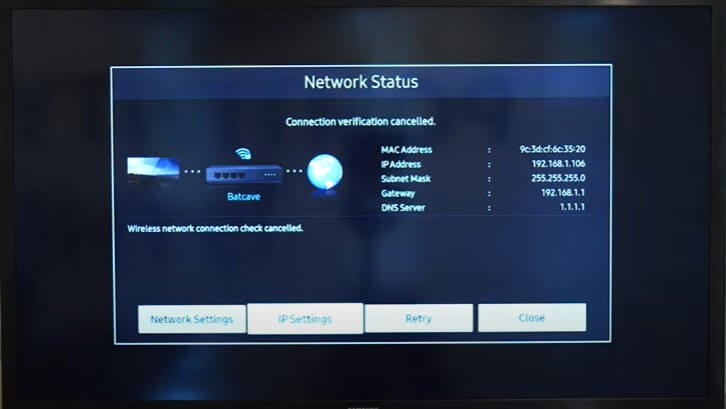
[6] From there, navigate to DNS Settings and select Enter Manually.
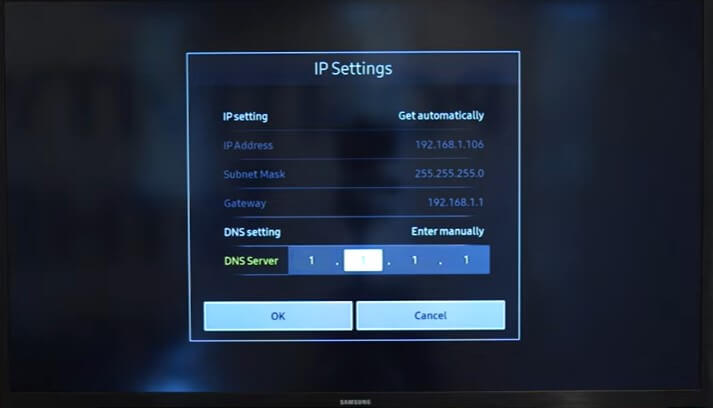
[7] Enter the desired IP address close to your location.
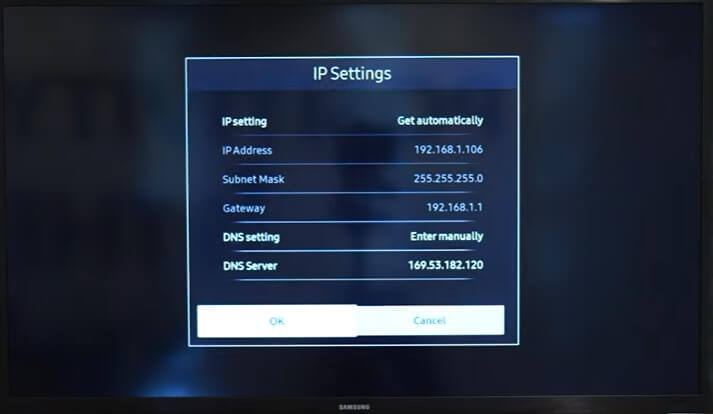
[8] You can see the changed IP address on the DNS Server. Select OK.
[9] Now, wait for the internet connection test to be complete.
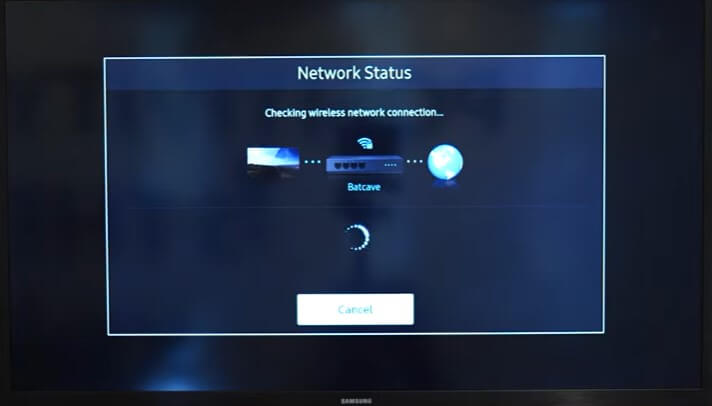
[10] Once the wireless network connection is established, restart your Samsung smart TV.
After changing the DNS settings on your smart TV, you can watch all channels restricted to your region.
How to Solve Errors on DNS Settings on Samsung Smart TV
If you have any issues with your DNS settings, check whether your WiFi router is near your smart TV. If you have changed the ISPs (Internet Service Provider) default settings, revert to their original settings. Additionally, try to power cycle and update your Samsung Smart TV to the latest version to fix the errors.
FAQs
When you change your DNS setting to 8.8.8.8, you will be switched from ISP to Google Public DNS, which will be much safe and more secure.



Leave a Reply