Hisense TV has all your favorite apps and channels. It ensures you the best streaming experience of movies, TV shows, and live TV channels. Just like any other media streaming device or Smart TV, you need to connect your Hisense TV to WiFi to access content from it.
How To Connect Hisense Smart TV To WiFi
You can connect your Hisense TV to the WiFi in simple steps as follows.
Quick Guide: Press the Home button > Go to Settings > Select Network > Choose Network Configuration > Choose a WiFi network.
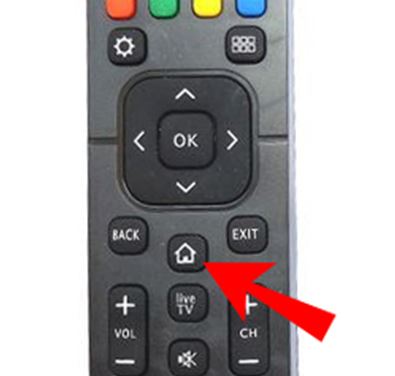
1. Press the Home button on the Hisense TV remote after turning on the device.
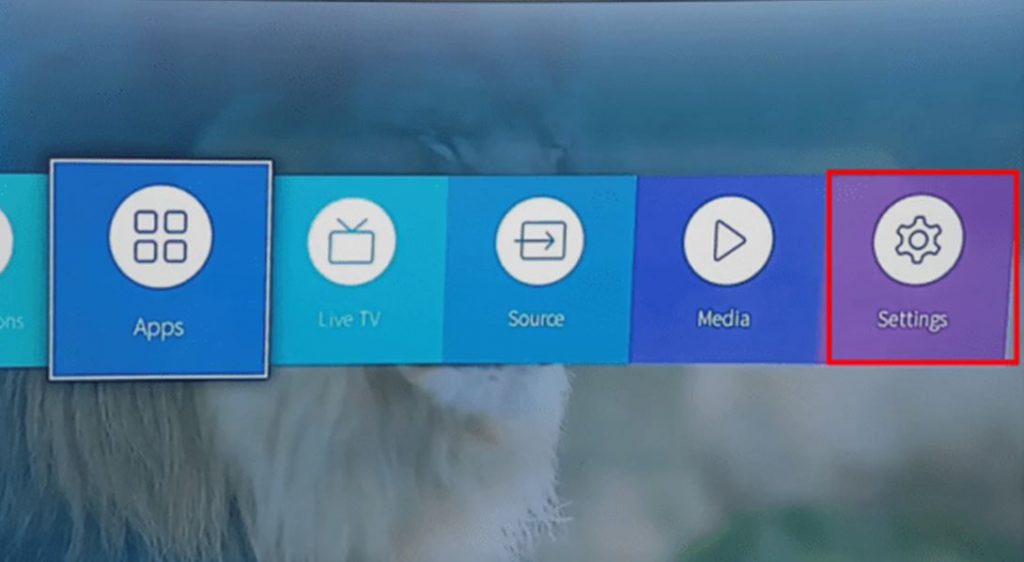
2. Next, select the Settings tile.
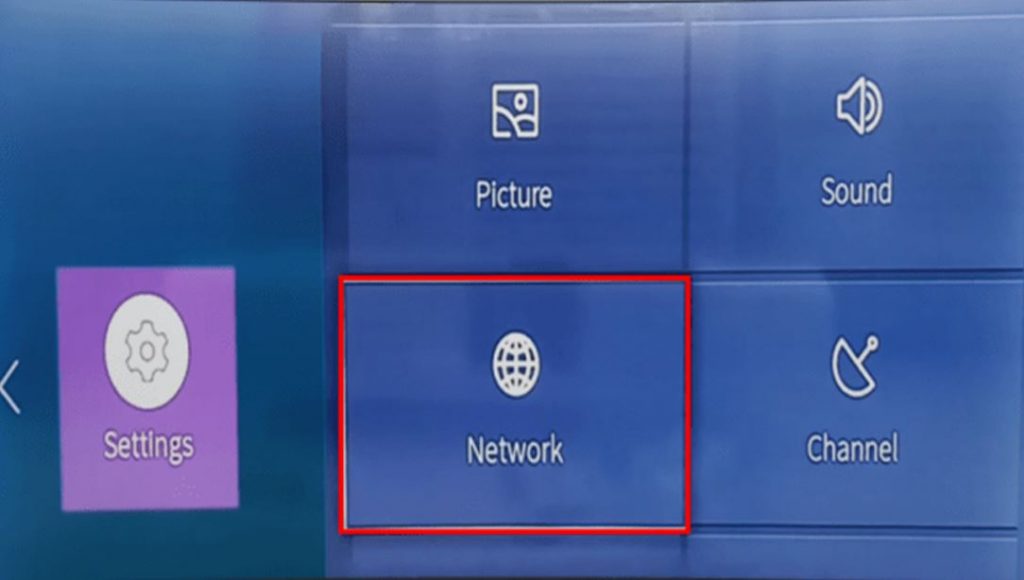
3. Next, select the Network option.
4. From the Network menu, select the Network Information option.
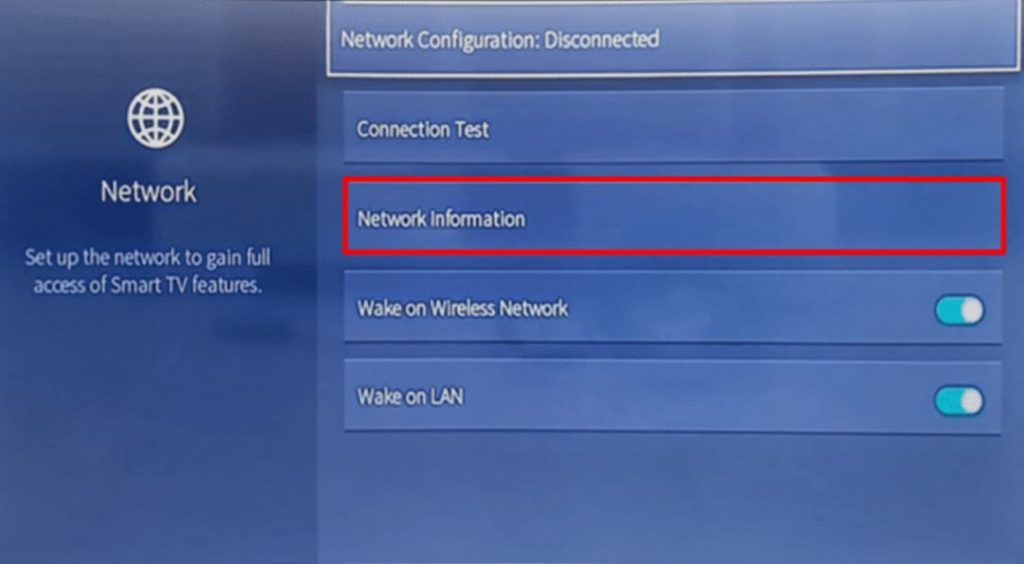
5. Select the Network Configuration option and then the Wireless option.
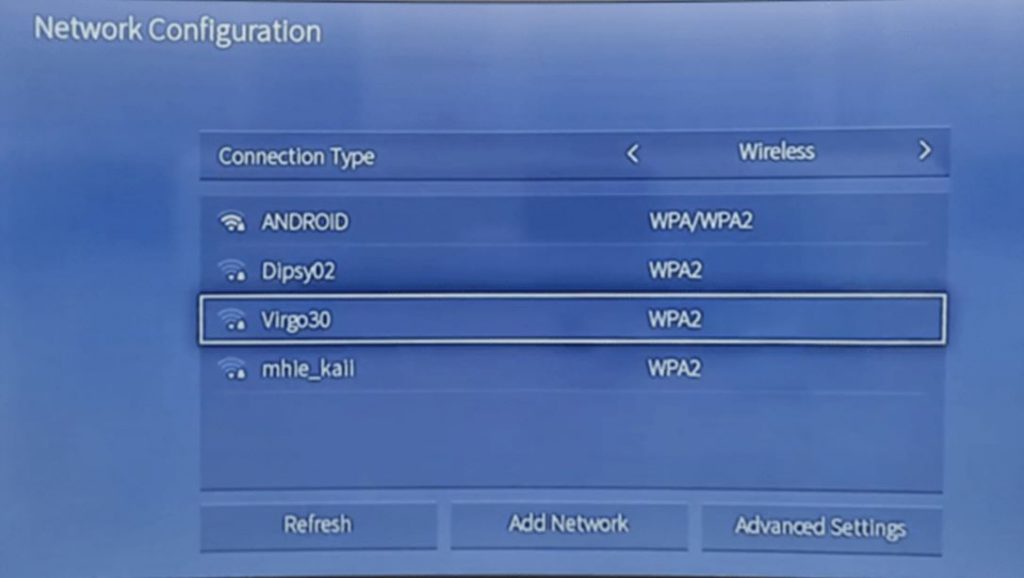
6. Choose any WiFi network you like from the listing and type in the password.
7. Finally, click on OK and connect to the WiFi network.
How to Connect Hisense Android TV to WiFi
If you have a Hisense Android TV, follow these instructions to connect to WiFi.
1. From the Hisense Android TV home screen, open the Settings menu.
2. From the menu, select any one of the following series of options depending on the model that you have.
- Network & Internet > WiFi
- Network & Internet > Easy setup > WiFi
- Network > Network setup > Easy > WiFi
3. Select the WiFi network you need to connect with from your screen.
4. To connect manually to WiFi, click on Connect by Scan List. If you wish to connect automatically, click on Connect by WPS Button option.
5. If you click the Connect by Scan List option, you have to choose the WiFi network and enter the password manually.
6. If you click the Connect by WPS button, you have to choose the WiFi network and press the WPS button on the WiFi router.
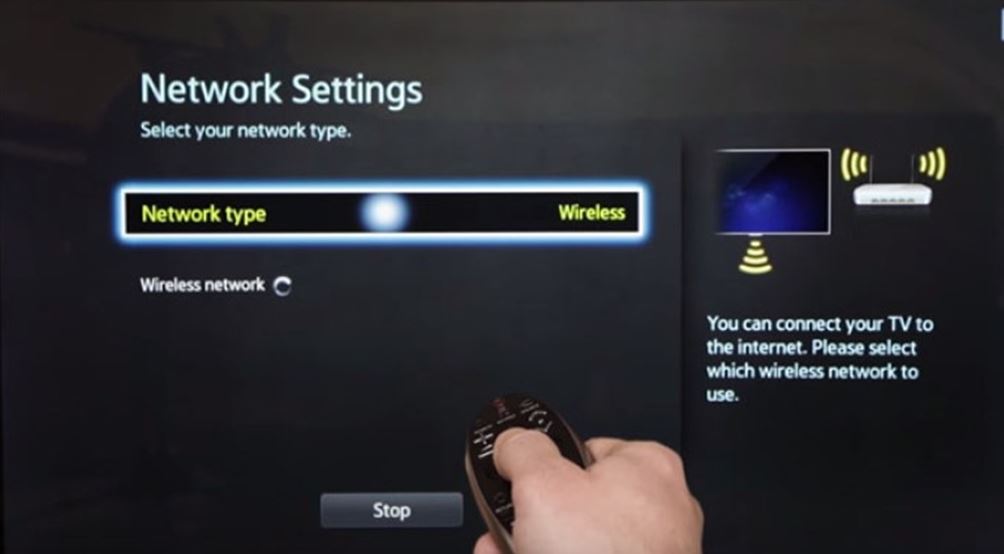
7. After that, your TV will be connected to the WiFi network.
How to Connect Hisense Roku TV to WiFi
If you have a Hisense Roku TV, follow these instructions to connect with a WiFi network.
1. Initially, press the Home button on the Hisense TV remote.
2. Open the Settings menu from the home screen.
3. Select the Network option from the menu.
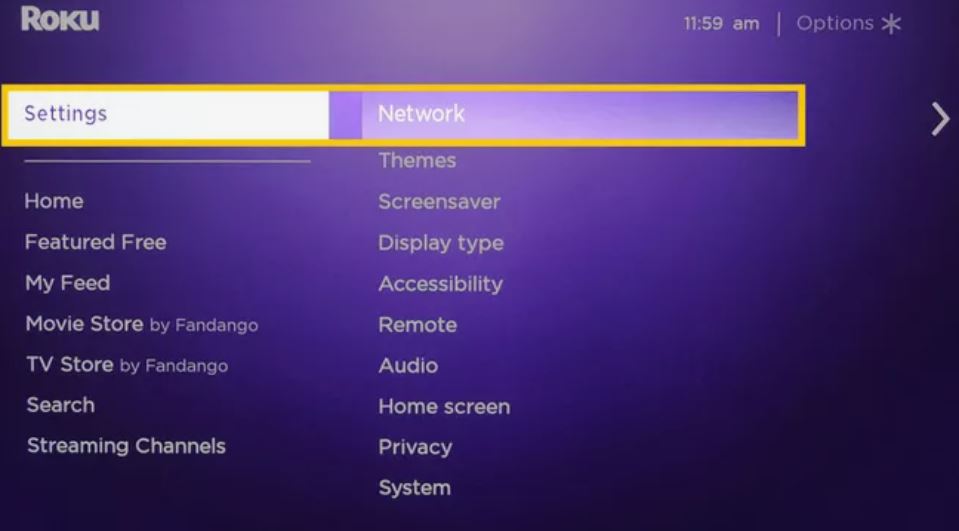
4. Select the Set Up Connection option.
5. Choose the Wireless option and select your desired WiFi network.
6. Find your network and then enter the password to complete the process.
How To Connect Hisense TV To WiFi [Wired]
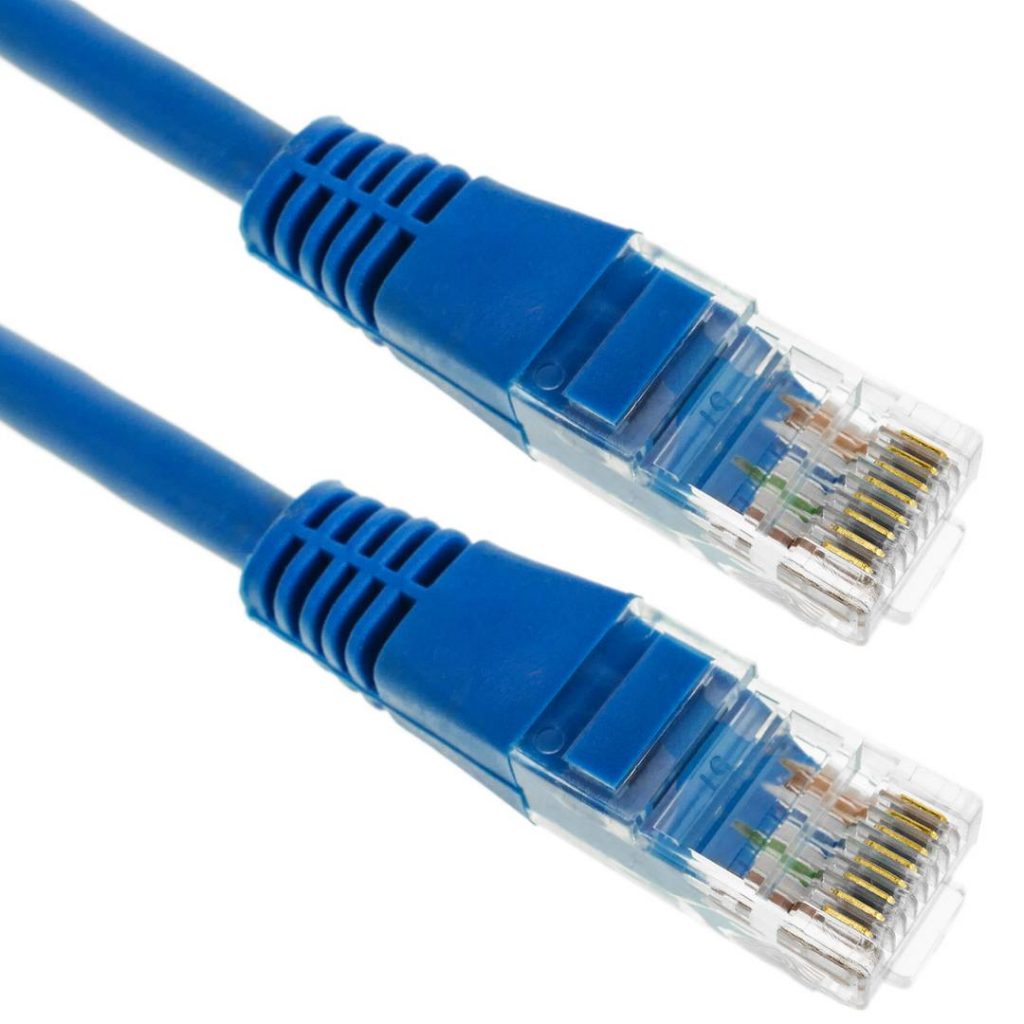
1. Connect the one end of the Ethernet cable to the LAN Port on your Hisense TV. The other end to the WiFi router.
2. Press the Menu button on the remote.
3. Select the Network option and then the OK button.
4. Select the Wired Network option.
5. After a few seconds, your TV will get a WiFi connection.
How To Connect Hisense TV To WiFi Without Remote
You can connect Hisense TV to WiFi without a remote as well. However, it might be a bit complicated. Let’s find out two different ways to do the same.
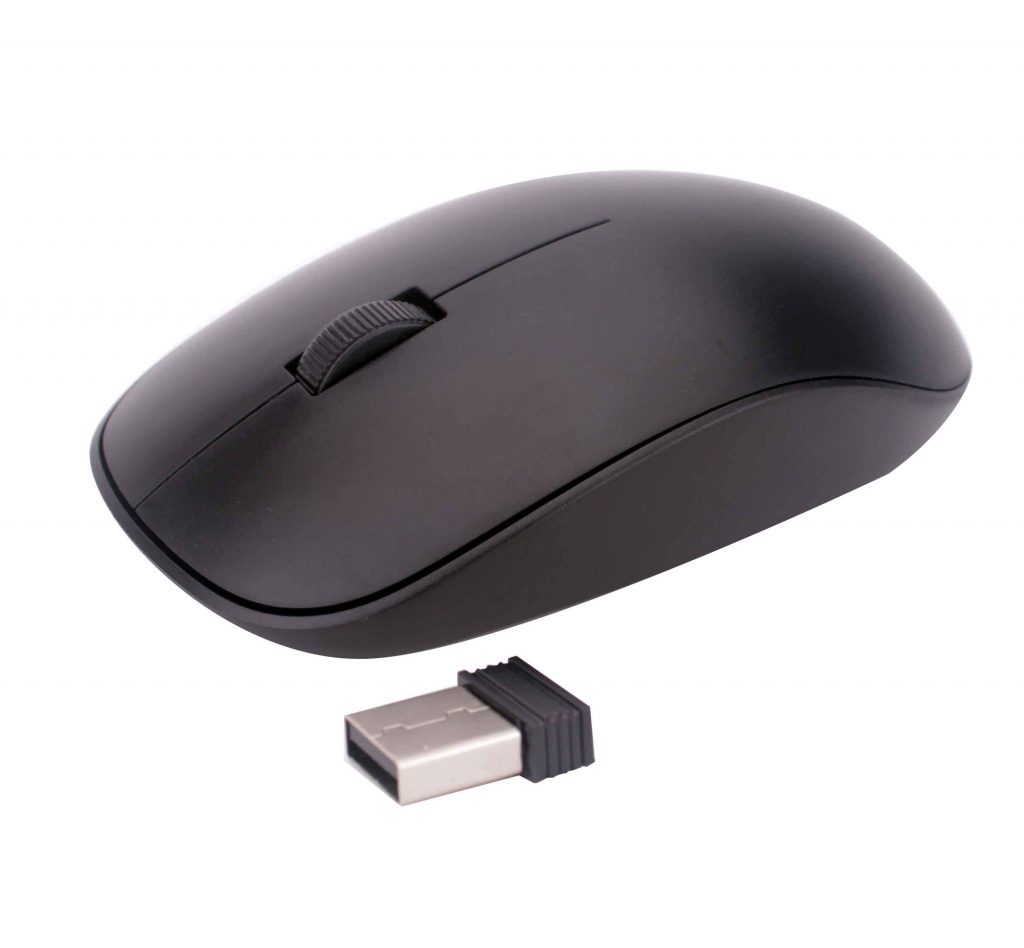
Using a USB Keyboard or Mouse
1. Press the Power button to turn on the Hisense TV.
2. Connect the wireless keyboard to the TV. You can use the mouse on your TV.
3. Use the wireless mouse to open the Hisense TV Settings menu.
4. Select the Network option and then the Network Configuration option from the drop-down menu.
5. Select the WiFi network that you want to connect with.
6. Connect with the WiFi network by entering the password.
Use Physical Buttons on the TV
1. Open the Settings menu on your Hisense TV using the physical buttons on your TV.
2. Select the Network Settings option.
3. Choose the Network Configuration option and choose a WiFi network of your choice.
4. Enter the password to connect with the WiFi network using the buttons on your TV.
Why Won’t My Hisense TV Connect to WiFi?
1. Check if you have entered the correct WiFi password on the TV. Most of the time, the Hisense TV will connect to the home WiFi automatically. If you have recently changed the password and you have to enter the password manually on your TV.
2. Make sure that all the connections and cables of both your TV and WiFi router are not damaged.
3. Connect other devices like your smartphone and computer to the WiFi network. If these devices work properly on the WiFi network, you can make sure that the issue isn’t with the WiFi network.
4. Restart your Hisense TV to fix minor issues on it. You can restart the Hisense TV as follows. Press the Menu button > Support > Enter/Select button > Self diagnosis > Reset.
5. If you have a connected VPN to your Hisense TV, it might hinder you from connecting to the WiFi network. Disable the VPN from your TV to connect with the WiFi properly.
6. Perform a power cycle on your Hisense TV. Turn off your Hisense TV and unplug it from the power source. Plug your TV back into the power source after a couple of minutes and turn it on.
7. You need to clear the network cache as follows. From the menu on your Hisense TV, open the Settings menu > General > Network > Network Status > Network Reset.
Frequently Asked Questions
Press the Home button on your remote > select Settings > Network > Network Configuration > Choose a WiFi network.
Yes, all the latest models of Hisense TV come with Android OS or Roku OS. Earlier, Hisense TV had the VIDAA OS.



Leave a Reply